
Construction projects, whether a full-scale home build or a simple bathroom remodel, generate an astounding amount of waste. From splintered wood and broken concrete to piles of dusty drywall, managing this byproduct is essential for safety, efficiency, and project completion. Without a clear plan for construction debris removal, your job site can quickly become unsafe, non-compliant, and ultimately, more expensive.
This comprehensive guide will walk you through the entire process, from establishing a professional waste management plan to mastering the technical demolition of specific materials like drywall and tile. For homeowners and contractors alike, understanding the logistics including who is responsible for the waste and the most efficient disposal methods is the key to a clean, successful project.
Professional Debris Removal Strategies
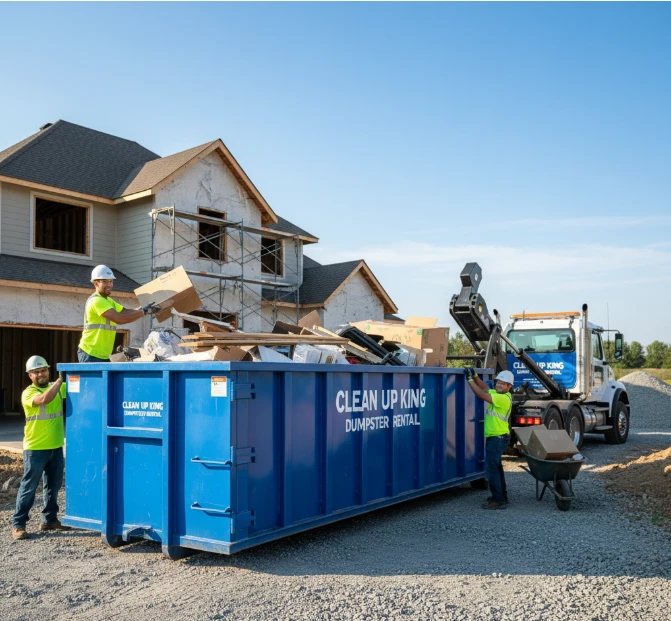
The first step to effective waste management is deciding on the right disposal method. For large projects, an established debris hauling company like us at Blue Collar Cleanup can manage the entire process, providing the logistical support needed to keep the site clear.
Dumpster Rentals vs. Professional Hauling
Understanding the options available is critical to selecting a debris management strategy that suits your project’s scope, budget, and timeline. Dumpster rentals require you to do all the loading, while professional hauling includes the labor, which is a significant factor in managing heavy or awkward waste.
| Debris Removal Method | Best For | Pros | Cons |
| Roll-Off Dumpster Rental | Large-scale construction, heavy materials (concrete, roofing), jobs with dedicated site labor. | High capacity, central collection point, cost-effective for high volume. | Requires permit for street placement, risk of overfilling/contamination, labor not included. |
| Professional Debris Hauling | Medium-to-large projects, mixed-material cleanouts, post-demolition final sweeps, and sites with limited space. | Labor is included (we load the debris), specialized sorting for recycling, and quick turnaround. | Higher per-yard cost than a dumpster, scheduling required, generally not suited for long-term daily construction waste accumulation. |
| Bagster/DIY (e.g., Home Depot) | Small renovations (bath, small kitchen), quick cleanups with light debris. | Conveniently available at stores like Home Depot, construction debris removal aisles, and flexible scheduling. | Weight and volume limits are strict, collection fees are separate from bag cost, and it is not practical for heavy construction waste. |
A popular option for smaller residential jobs is the Bagster, which is often found in the Home Depot construction debris removal section. This heavy-duty container is convenient for small volumes of debris like a single bathroom’s worth of ceramic tile or a few dozen sheets of drywall, but it’s rarely suitable for major projects.
For a hassle-free solution that gets rid of everything from packaging to heavy concrete in one go, a professional debris removal service is often the most efficient choice, especially if you’re a general contractor or homeowner looking for comprehensive junk removal in Lodi and the surrounding areas. Our services are tailored to minimize disruption to your project while maximizing cleanup efficiency.
Subcontractor and Framer Responsibilities
A recurring challenge on a bustling job site is clearly defining waste removal responsibilities among the different trades. The question often comes down to: do framers remove their own construction waste? And similarly: do subcontractors remove their own construction waste?
On a large commercial or residential build, the general contractor (GC) typically oversees the overall site cleanliness and provides the main waste receptacles. However, the contract can and often does stipulate that each subcontractor, including framers, plumbers, and electricians, is responsible for gathering, sorting, and delivering their debris to the main collection point. A professional GC will integrate a clear construction debris removal clause into every sub-agreement.
This approach ensures accountability. For example, the trade responsible for framing should handle the cleanup of their wood offcuts. This practice, known as “Keep Clean,” requires the framers to remove their own construction waste from their immediate work area daily, preventing dangerous debris buildup.
It is crucial to note that while cleanup duties can be delegated, the main contractor maintains the ultimate Duty of Care for all waste generated on the site. This means the GC is legally responsible for ensuring all debris is disposed of properly and lawfully. A truly professional cleanup operation (like the kind detailed on our About Us page integrates a waste management plan that holds all parties accountable. When you use our service, we simplify this process by providing a centralized and efficient hauling solution that works seamlessly with your existing team’s cleanup protocol.
Technical Demolition and Material-Specific Removal
After the initial demolition, the most labor-intensive and messy part of any renovation is the targeted removal and cleanup of specific materials. Drywall, due to its volume and dust, is a primary offender.
How to Remove Drywall and Drywall Ceiling
Drywall also known as sheetrock or wallboard is gypsum encased in thick paper. When removing it, precision and dust control are critical. The steps for a wall and how to remove drywall ceiling are nearly identical, with extra attention needed for overhead safety.
- Safety First: Before starting, turn off all power, water, and gas lines to the work area. Use a non-contact voltage tester to ensure all wires are dead. Always wear a respirator, safety glasses, and gloves.
- Prep the Zone: Seal the work area with plastic sheeting and use drop cloths. Drywall dust is extremely fine and can contaminate the rest of the house.
- Locate Fasteners: To avoid tearing off large, unmanageable sections and minimizing wall damage, target the fasteners.
- How to Remove Drywall Screws: If the drywall is attached with screws (common in modern construction), attempt to remove them first. Use a utility knife to score around the screw head to break the joint compound seal, and then use a drill or Phillips-head screwdriver to back the screw out. If the head is stripped or completely covered, you may need to use a wide putty knife as a buffer and pry out the screw with a pair of end-cutting pliers.
- Cut and Pry: Use a utility knife or a drywall saw to cut the sheet into manageable 2×2 or 4×4 sections. Start at a corner or the bottom edge and use a pry bar to gently pull the section away from the studs. Be careful not to damage the studs, plumbing, or wiring behind the wall.
Niche Removal Challenges
Two frequently encountered removal challenges involve embedded fasteners and decorative finishes:
Plastic wall anchors, unlike screws, are designed to expand and grip the back of the drywall. The most effective way to remove the common cone-shaped anchor is to use the screw itself:
- Insert a screw into the anchor about three-quarters of the way.
- Grip the head of the screw with needle-nose or standard pliers.
- Gently wiggle the screw and pull the entire assembly (screw and anchor) out.
- If the anchor is stubborn, you can use a utility knife to slice the collar of the anchor flush with the wall and tap the remaining plastic piece into the wall cavity, then simply patch the small resulting hole.
Tile is often set with adhesive directly onto drywall, particularly in backsplashes or other low-moisture areas. This adhesive creates a powerful bond with the drywall paper, and often, the paper and gypsum core will fail before the adhesive does. The reality of how to remove wall tile from drywall is that you should almost always plan to replace the drywall section behind the tiles.
For a full renovation:
- Accept the Wall Damage: Plan for a full drywall replacement where the tiles are located.
- Safety Gear: Always wear heavy gloves, long sleeves, and safety glasses, as ceramic and porcelain shards are extremely sharp.
- Pry and Chip: Use a hammer and a wide, flat chisel or pry bar to tap and chip the tiles off. Work one tile at a time, aiming the chisel under the tile’s edge. The underlying wall will likely be too compromised for a smooth patch, making a full sheet replacement to the nearest stud the more reliable and professional route.
How to Remove Drywall Dust
After the large pieces are bagged and hauled away, the most persistent problem is the fine, white gypsum dust. This dust is a respiratory irritant and requires specialized cleanup, known as how to remove drywall dust.
- Use a wet/dry vacuum with a high-efficiency particulate air (HEPA) filter to vacuum all debris from surfaces and floors. Never use a standard household vacuum, as the fine dust will ruin the motor and exhaust the particles back into the air.
- Damp-wipe all surfaces walls, ceilings, plastic sheeting, and tools to pick up residual dust particles that the vacuum missed. A tack cloth can be highly effective.
- For professional-grade cleanup, running an industrial air scrubber in the work zone for 24-48 hours after demolition will capture airborne particles and significantly improve air quality and safety before the next phase of work begins.
Segregation and Sustainable Disposal
Responsible debris management is increasingly focused on sustainability. Separating waste at the source not only minimizes environmental impact but can also reduce costs by diverting materials from expensive landfill disposal. This is a core part of any effective construction debris removal strategy.
Construction Waste Segregation Guide
| Debris Type | Disposal/Recovery Method | Acceptable for: | Pro Tip |
| Clean Wood | Recycling, Chipping, Biomass Fuel, or Salvage (e.g., framer offcuts, untreated lumber) | Dedicated wood-only dumpster or bin. | Never mix painted, treated, or stained wood it must be placed in a mixed debris bin. |
| Metals | Scrap Metal Yard, Recycling | Dedicated metal bin (rebar, copper, aluminum, wiring). | Steel and aluminum scraps can be recycled indefinitely, potentially generating minor revenue to offset disposal costs. |
| Concrete/Masonry | Crushing, Aggregate Recycling, Fill Material | Dedicated inert debris container. | Crushed concrete can be reused as a base material on the job site for new paving or pathways, saving material costs. |
| Drywall (Gypsum) | Specialized Drywall Recycler, Landfill | Dedicated drywall-only bin (where available). | Drywall can sometimes be recycled for agricultural purposes or new drywall manufacturing. Check local waste facility regulations. |
| Mixed Debris/Trash | Landfill or Material Recovery Facility (MRF) | Standard mixed debris roll-off container. | This bin is for non-recyclable items like insulation, packaging, and non-hazardous garbage. |
A well-executed plan for segregating materials, especially on-site, is the hallmark of a professional construction debris removal operation. Our team is trained to assist with this sorting process to maximize recycling and minimize the environmental footprint of your project.
When In Doubt, Call the Experts
Navigating the complexities of waste disposal, from coordinating who is responsible for what (i.e., do framers remove their own construction waste?) to understanding local regulations and properly handling hazardous materials, can be overwhelming. The difference between a clean, efficient job site and a cluttered, costly mess often comes down to the quality of your debris management plan.
If your project is located in the greater San Joaquin Valley and you need reliable, professional construction debris removal services, let our team handle the dirty work. Stop searching for “how to remove construction debris” and start building. Contact us today to schedule your cleanup, request a quote, and learn how we can keep your site running smoothly and safely. We are ready to take on the labor and logistics of your project cleanup.

